

What is an inexpensive, easy, almost mess-free, healthy and edible project? Roasting a pumpkin!
The Nutritional Lowdown:
Roasting a pumpkin is not only easy, cheap and fun, in the end you have something that tastes great and is great for you and the kids. Pumpkins are low in calories (if you are concerned) and rich in fiber, anti-oxidants, vitamin-A (good for protecting your lungs and oral cavities from cancer and your vision), vitamin-C, vitamin-E, B-complex vitamins (folates, niacin, vitamin B-6) and minerals like copper, calcium, potassium and phosphorus.
To top it all off, when you are done you have the pumpkin puree and the seeds – another fun activity to do with the kids, plus they will have a snack they can eat immediately that is full of fiber, protein, iron, zinc and other essentials for growing munchkins.
Now the fun stuff:
We grew edible pumpkins in the garden this year, with 10 beauties to show for it. My 23-month-old, Logan, loves our pumpkins and was often showering them with kisses and encouraging pats. Once we had a hard frost, we brought them all to the house to line our steps. Unfortunately, one dropped and got a soft spot on the bottom. The original plan was to roast them and make pumpkin puree (after Halloween) but apparently this pumpkin felt it should be eaten earlier.
So we laid out some newspaper on our table, turned the oven on to 375 degrees and put our pumpkin on top. Of course we had to take a picture and give it a quick kiss (Logan did the honors) before we got down to business.

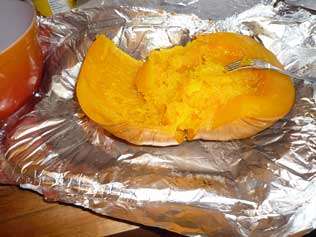
We cut off the top and the bottom (where the spot had formed) and halved it.

Next we used big spoons and our hands to scoop out the guts, seeds and all. Most kids love the feel of the stringy insides. My 9-month-old, Lucas, was no exception. Logan preferred to stick to the spoon, although he kept touching it experimentally and exclaiming how cold it was. (It was outside until now).
Once we hollowed it out, we put it into a pan, skin side up.

Logan poured 16 oz of water (this was the size of our pitcher, not an exact/specific measurement) into the pan. This helps steam the pumpkin and keep the skin soft. It is better to air on the side of too much water than too little, as without enough the edges will dry out and get hard.
We covered the pan with aluminum foil, gave it a final pat and popped it into the oven for 90 minutes. (I was hopeful that the kids would both nap during this time. It didn’t happen but that’s okay. There is always tomorrow).

Next, we took our pumpkin guts to the sink and rinsed them and separated the seeds. We decided to save some for planting next year and some for baking. (See below for our seed recipe testing).
After the baking was complete, we scooped the soft orange flesh out of the skins and put it into the blender.

Now what do you do with fresh pumpkin puree? Look for great recipes that call for fresh pumpkin or you can put your pumpkin into a strainer with some cheese cloth (I always use coffee filters because they are cheap, easy and I don’t have to worry about cleaning them later) and let them drain the water out. Once the water has drained, you can use the puree as if it were out of a can.
Overall, this was a really simple and fun project. It didn’t require any set up, it required almost no clean up. And in the end we used almost the entire pumpkin. I had been procrastinating on roasting a pumpkin (for about 8 years). All the cooking magazines and blogs tell you to do it but it seemed too involved and too “foodie” for me. Now I shake my head in disbelief – why did I wait so long? I plan on roasting the rest of the pumpkins up this year and cannot wait to do it again next year.
Also, as a side note, you can freeze or can your pumpkin puree. I am choosing to freeze mine because most recipes require canning it for 90 minutes in a pressure cooker and our new pressure cooker requires us to sit and watch the pressure gauge the entire time? I just don’t have the time. Some of you might and it is a great way to preserve your (and your kids) hard work. Good luck! Let us know how it turned out.
Stop by my Web site www.themessyorganicmum.com to see how I am using all this pumpkin!
As for the seeds, there are a number of recipes out there. Since I had never done it, I made two batches. The first was inedible (well the chickens loved them, but they aren’t very discerning). The second batch was simple:
Roasting a Pumpkin with Messy Organic Mum Recipe Instructions
roasted pumpkin seeds recipe
Ingredients
Directions
- Pumpkin Seeds
- Olive Oil
- Pinch of Salt
- Other seasonings to taste
- Preheat oven to 350 degrees
- Pat the seeds dry
- Toss in olive oil
- Spread into single layer on baking sheet
- Sprinkle with salt (and other seasoning to taste)
- Bake for 15-20 minutes or until crisp and crunchy
- Let cool before enjoying.
Share:
Mini Turkey Corndogs with Smoky Ketchup Recipe
Make Your Own Frozen Yogurt Recipe