

Alright, so if you love Cinnabon, you will LOVE these! They are heaven on a plate! And they will not last on your counters for long!! Wouldn’t these just be the perfect start to any day, especially maybe the perfect breakfast in bed.
Many women that I know complain that they can never bake with yeast because they can never get it right, so they’ve given up completely on baking delicious goodies like cinnamon rolls! Have no fear? I have some great tips to help even the baking-newbies out there!
In the baking aisle, you can find packages of instant yeast. They come in strips of three packs together. Those are what I use every time! Also, trying to guess the perfect temperature for your milk is not a sure-fire way to make this work! Invest in a baking thermometer! I bought one for less than $10. If you want a fancy digital one, they are between $20-40. It’s completely up to you, but the cheaper one fits more in my budget.
Alright, time to bake!! Begin with your milk (I use dry instant milk, but regular would work fine) and for it in the microwave for 5-10 second intervals until you’ve reached the correct temperature (using your brand new baking thermometer!ÿ Ahhh, it makes it so easy!). My packages call between 110-115 degrees to activate the yeast (make sure to check yours and follow that!). Stir in the 1/2 cup of sugar and then dump in your packages of yeast and stir very well. After a couple of minutes, a foam or froth will begin to appear on top of the milk. Grow, yeast, grow!!! Once it has risen between 1/2 inch and 1 inch, it’s ready to go!! Beat in your eggs, butter, and salt. Alright…now adding the flour. This is important–if you are using a Kitchenaide mixer, DO NOT OVERMIX. You will beat your dough to death, and it will become too stiff. I have better results when I mix with my hands…yes, it takes a little bit more time, it’s a little messy (make sure to take any rings off!!) but you won’t run the risk of over mixing your dough. I use a hand mixer to get it started (mixing in the first 2 cups of flour) so I don’t have too much of a sticky mess on my fingers. But then I slowly add in the rest of the flour and mix with my hands. This recipe calls for 4 cups of bread flour do not dump it all in and then mix. Add it slowly; you may not need that much–you may need more. Get it to a good dough consistency where it’s not sticking relentlessly to your hands but it’s not dry either.

Here is my dry instant milk that I use and my 1 cup of milk and sugar mix ready for the yeast!
Alright, so you’ve mixed your dough completely (by hands or you were very careful with your mixer…good work!). Place in an oversized mixing bowl and cover with a damp cloth or towel and let sit for one hour! (This is a nice break! Go enjoy a shower, a power nap, or your favorite TV show. I like this part!) The dough should expand to double its original volume.
After the hour is up, prep your countertops for the rolling out. Take maybe a quarter of the dough and knead it a few times before rolling it out to be about 1/4 thick. If the dough is super sticky, add some flour to the countertop before doing so. If it keeps sticking to your roller, sprinkle some flour on top of the dough or smooth it over your roller. I added too much flour to mine that’s why you see no flour in my pictures (oops…the recipe I was originally following called for 4 and a half cups of flour… WAY too much… sigh.)

Got all of my ingredients ready! (Well you can’t see my bowl of butter…and I didn’t end up needing the extra flour…but you probably will!)

Alright, now the fun part that makes it just so darn delicious!!! Lather on the butter!!!! Yup, I go way overboard on this part, but you want all the sugary and cinnamon goodness to stick!!! So can’t have too much butter!!

Yup yup yup…I’m tellin’ ya…. Doesn’t it look great!! So after you lather on the softened butter, sprinkle on some white sugar, then the cinnamon, and then (the best part) the brown sugar!!!! The brown sugar is what separates good cinnamon rolls from AMAZING cinnamon rolls.ÿ So I add a lot. Then I pack it all down with a large spoon or clean hands and smooth it all out to make sure it’s all sticking well to my butter so it doesn’t all fall out when I begin cutting the dough.I begin cutting the dough
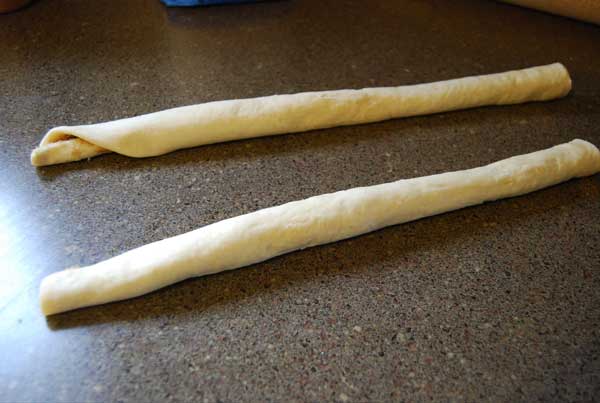
So my confession is… I love mini cinnamon rolls! So I actually cut the rolled dough in half and then roll it up in two so that they are minis! You don’t have to do this, obviously. You can create all medium-large size cinnamon rolls depending on your preference, but I love litte bite sized ones, so that’s what I do…

Alright, so this part is kinda fun. You can use a knife (or my mom uses floss or string…)I go way overkill and use a big butcher knife to cut out my cinnamon rolls! Then place them in a sprayed pan and let them sit to rise again (I usually just let them sit while I finish rolling out all the dough and making the rolls, and then once I’m all done with that, they are ready to go into the oven).

See I put my little minis in cupcake pans! But I decided to make some medium sized ones too, so you can see those in my pictures below! Allow some room between the rolls because they do expand a bit before getting put into the oven, and then they grow just a little bit more. The picture of the round pan is a perfect example. You can see how I spaced them…and then in the final picture you can see (through all the icing!) that they all expanded together! This is the best way to go because that way they keep each other from drying out and when you cut them out, the sides are all soft and delicious!

This round pan was perfectly spaced! Place in preheated oven of 400 degrees. The minis should only go in for about 6 minutes. The medium sized went in for about 14 minutes. As you pull them out, they will have a slightly golden brown color (see in picture to the right).

Just out of the oven!! (I overcooked these ones just a tad, but they were still so delicious!)


Cinnamon Rolls Recipe Instructions
cinnamon roll recipe
Ingredients
Directions
cinnamon roll icing recipe
- 4 packages of instant yeast
- 1 cup warm milk (110 degrees F/45 degrees C)
- 2 eggs, room temperature
- 1/3 cup butter, melted
- 4 cups bread flour
- 1 teaspoon salt
- 1/2 cup white sugar
- 1 cup of butter, softened
- Cinnamon
- White sugar
- Brown sugar
- Begin with your milk (I use dry instant milk, but regular would work fine) and for it in the microwave for 5-10 second intervals until you?ve reached the correct temperature (using your brand new baking thermometer! Ahhh, it makes it so easy!).
- Stir in the 1/2 cup of sugar and then dump in your packages of yeast and stir very well. After a couple of minutes, a foam or froth will begin to appear on top of the milk.
- Once it has risen between 1/2 inch and 1 inch, it’s ready to go!! Beat in your eggs, butter, and salt.
- Alright…now adding the flour. This is important…if you are using a Kitchenaide mixer, DO NOT OVERMIX. You will beat your dough to death, and it will become too stiff. I have better results when I mix with my hands…yes, it takes a little bit more time, it’s a little messy (make sure to take any rings off!!) but you won’t run the risk of over mixing your dough. I use a hand mixer to get it started (mixing in the first 2 cups of flour) so I don’t have too much of a sticky mess on my fingers. But then I slowly add in the rest of the flour and mix with my hands. This recipe calls for 4 cups of bread flour… do not dump it all in and then mix.
- Add it slowly; you may not need that much…you may need more. Get it to a good dough consistency where it’s not sticking relentlessly to your hands but it’s not dry either.
Ingredients
Directions
- 1 (3 ounce) package cream cheese, softened
- 1/4 cup butter, softened
- 1 1/2 cups confectioners? sugar
- 1/2 teaspoon vanilla extract
- 1/8 teaspoon salt
- 1/4 cup milk
- 1 tablespoon of Mapleine
- I usually get all of my pans out of the oven before making the icing because they need time to cool a bit before putting the icing on (otherwise it’ll all melt off and down the sides or into the dough, and it’s better if you have a nice thick coat of icing on top!)
- Aside from the powdered sugar, beat together all of the other ingredients first. Then slowly add the powdered sugar until all is mixed.
- The amounts of mapleine and milk can be altered drastically depending on personal preference. Mapleine (found in the baking aisle) will add a hint of maple favor to the icing that makes it sooo good!
- Adding more milk will make thinner icing. Also, I pour the icing all on right away while the cinnamon rolls are still in the pan (instead of just adding it on right before you eat it) because it will keep the rolls soft and moist. Also, once cooled enough, make sure to cover with stretch plastic wrap! This will also keep them from drying out.
- Once completely cooled, before you serve, pop them into the microwave for 10 seconds to warm them up just slightly. They are just so perfectly delicious!
Share:
Celebrate Independence Zak! Style
Celebrating Summer with Zak!